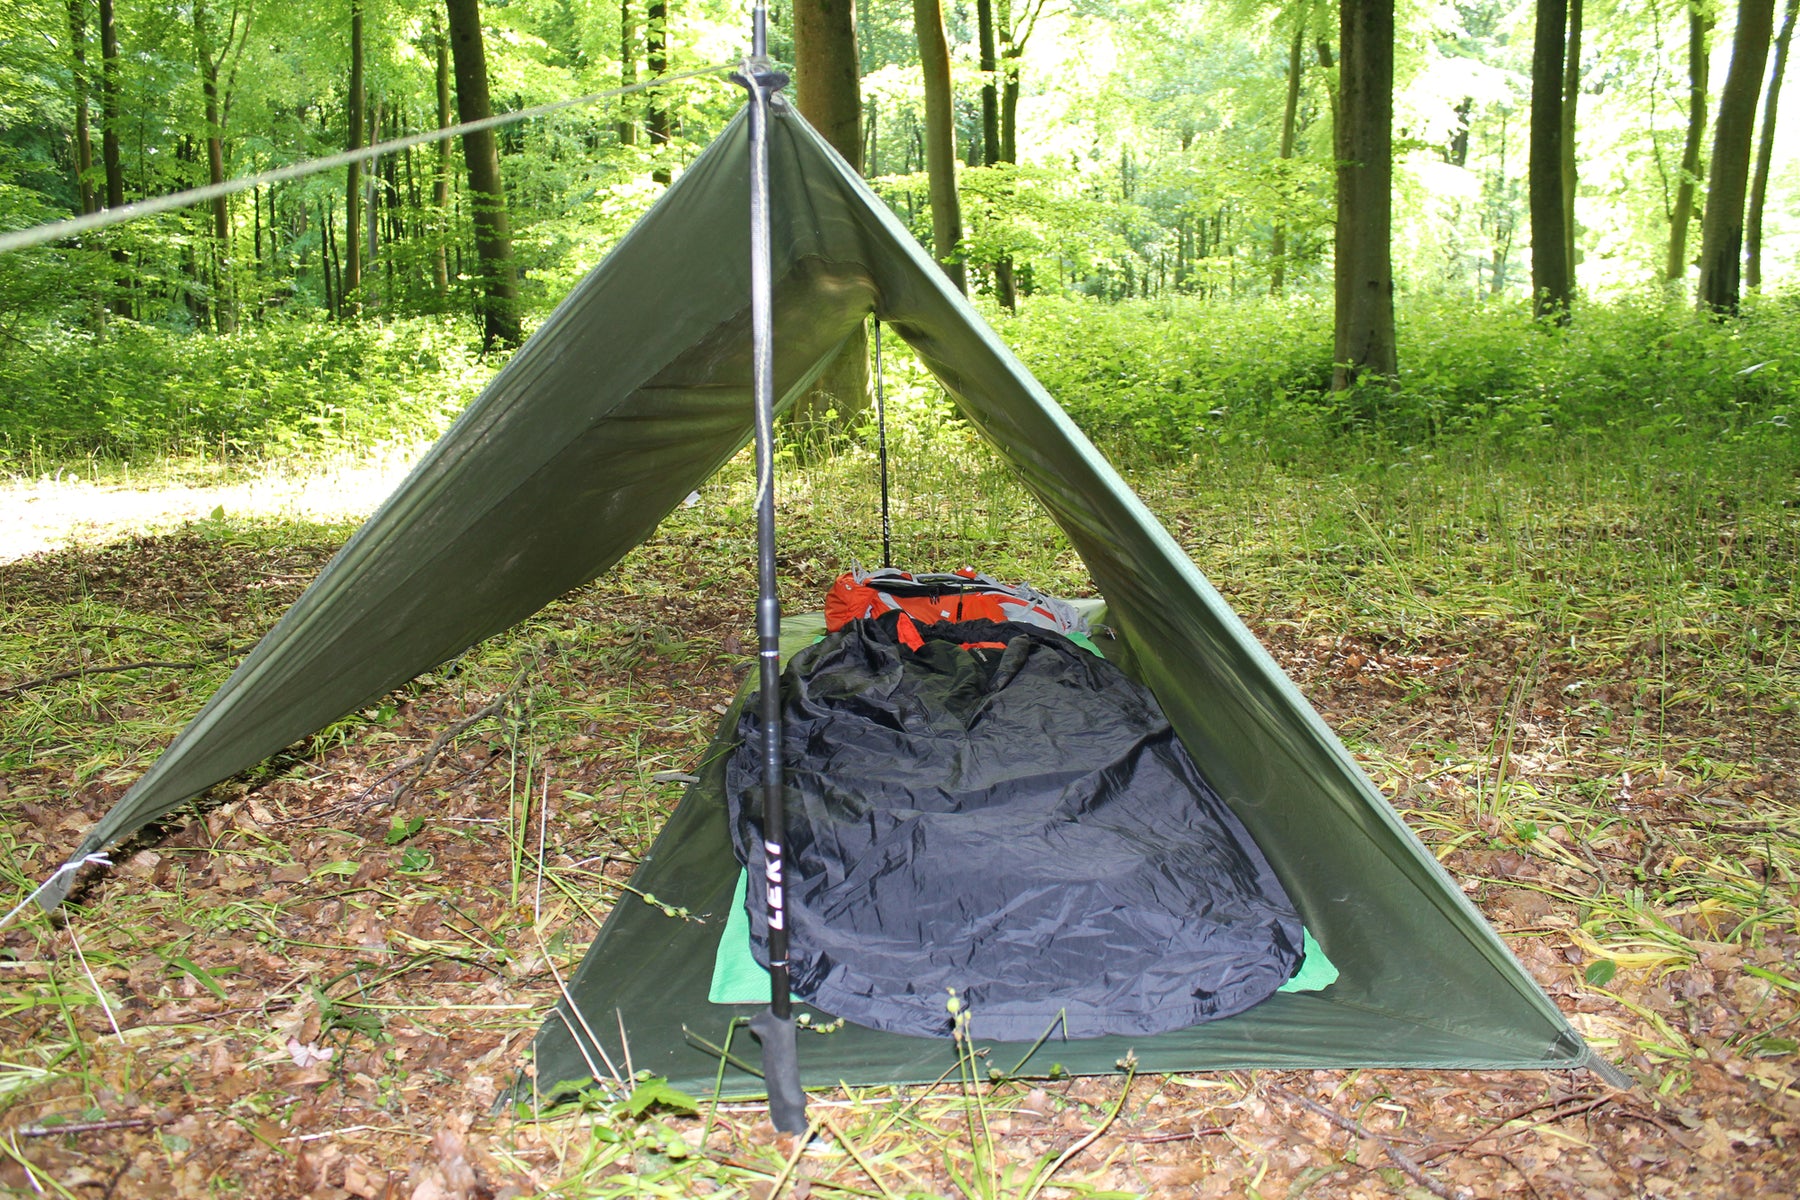
Using a Tarp, the Snugpak All Weather Shelter, for wild camping or just in case of emergencies, is a unique way to enjoy the great outdoors; you are only limited to your imagination and ingenuity when the time comes to create your shelter. Many tarp designs require the use of well-placed trees to construct sturdy designs, however free-standing shelters can be made just as quickly with the addition of a couple of walking poles.
One of the most basic designs, the A-Shelter, normally requires the addition of two well placed trees to suspend your AWS from; but this design, more akin to a figure 4, can create an almost enclosed area like a tent.
Remember, your shelter protects you from the elements, including Sunshine when making a stop along the trails. With time and practise, you can construct some elaborate designs in only a couple of minutes, protecting you and your friends from inclement weather.
Follow the 10 Steps below, and you can construct a enclosed sleeping area for use in less than ideal conditions…
1. Layout the Shelter…
Lay the AWS Flat, looking for the tabs along the edges. Peg down one third of the shelter, which will become your sleeping space, protected on 3-sides.
Make sure the AWS is inside-out, i.e. the protective layer is facing the ground; when you fold this over (2), the shelter fabric is facing the right direction.
Lay the back edge of the AWS at an angle of 45 degrees into the wind. This will allow wind to blow along the back edge of the shelter prevent the majority of rain entering.
2. Fold Over the remainder of the AWS…
Now you can fold over the AWS so that two thirds lay on top of the base.
3. Measure your walking poles…
Now you can measure the height of your walking poles to the width of the sleeping area – these replace the infamous trees, and allow you to create a stable shelter.
4. Create the figure-4 end with one pole…
Now you can slide the tip of your walking pole into the tab, and attach a guy-line. Pull the line out at 45 degrees from the back edge of the shelter.
Don’t pull too tight just yet, as you need the other pole to create the structure of the shelter.
5. Repeat Step-4 for the other side…
This forms the basic shape of the shelter, which will be almost triangular in shape. Once both poles and guy lines are attached, you can then pull them as tight as possible to create rigidity to the AWS.
6. Fold Up the Excess Fabric…
Attach the tabs from the other side of the AWS and hang on the poles.
7. Fold-over the hanging material…
You have now created a free-standing lean-to shelter with a waterproof base.
8. Hanging the Excess…
In sunny weather, you can hang the flap to protect from sunshine etc, and create some shade.
9. Bungee down the remainder to enclose the shelter…
Now you can unfold the remainder of the AWS, creating a triangular enclosure. Use some home-made bungee cords (4-5mm) and tent pegs to hold it in place. At a stretch you can use heavy duty elastic bands. Loop them through the eyelets and secure.
(Shown in white for demonstration purposes)
10. Enjoy and Sleep well!
You have now constructed a free-standing, enclosed shelter. This will protect you from the majority of wind and rain, and along with a good sleeping system can be used for numerous wild camping trips.
Remember to keep those lines tight!
For Inclement weather and severe wind/rain, consider a different AWS design, such as the Manta… (Next Article)